debug-rails-server
Requirements
- ruby 2.6.0
- vscode IDE
- vscode-ruby extension.
Prepare an environment
!important If you have already installed debugger tools please remove these libraries: gem uninstall -aIx ruby-debug-ide
gem uninstall -aIx debase
Install
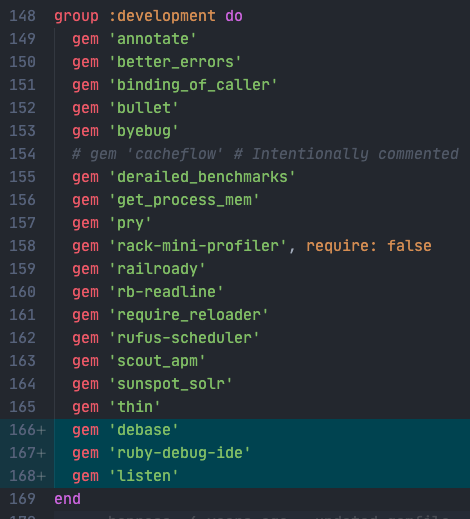
- In Gemfile, under group :development do line add these gems:
gem 'ruby-debug-ide'
gem 'debase'
gem 'listen'
bundle install
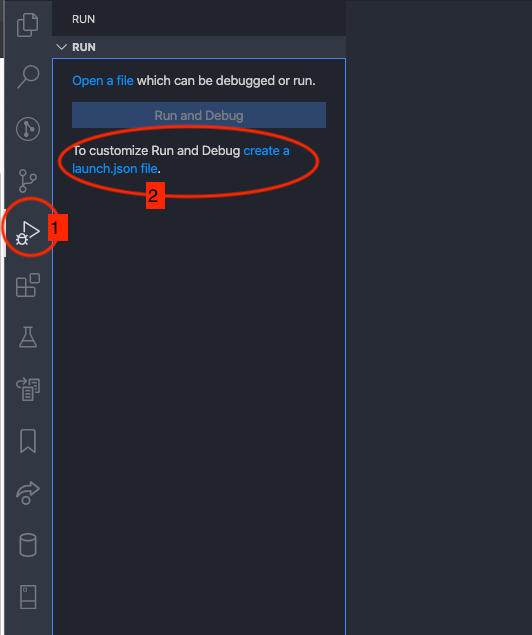
- Open debugger runner sidebar in vscode and create launch.json file
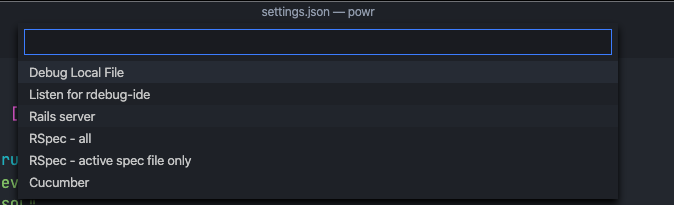
- After clicking create a launch.json file link, choose Ruby and Rails Server in opened dialogs

- Replace the content of launch.json with this:
{
  "version": "0.2.0",
  "configurations": [
    {
        "name": "Debug Server",
        "type": "Ruby",
        "request": "launch",
        "cwd": "${workspaceRoot}",
        "useBundler": true,
        "pathToBundler": "/Users/ranger/.rbenv/shims/bundle", // your path might be different, try running 'where is bundle'
        "pathToRDebugIDE": "/Users/ranger/.rbenv/shims/rdebug-ide", // your path might be different, try running 'where is rdebug-ide'
        "program": "/Users/ranger/.rbenv/versions/2.6.0/bin/thin", // your path and version might be different
        "args": [
           "start",
           "--ssl",
           "-p 3000",
        ]
    },
  ]
}
- Now you can run debugger through running tool
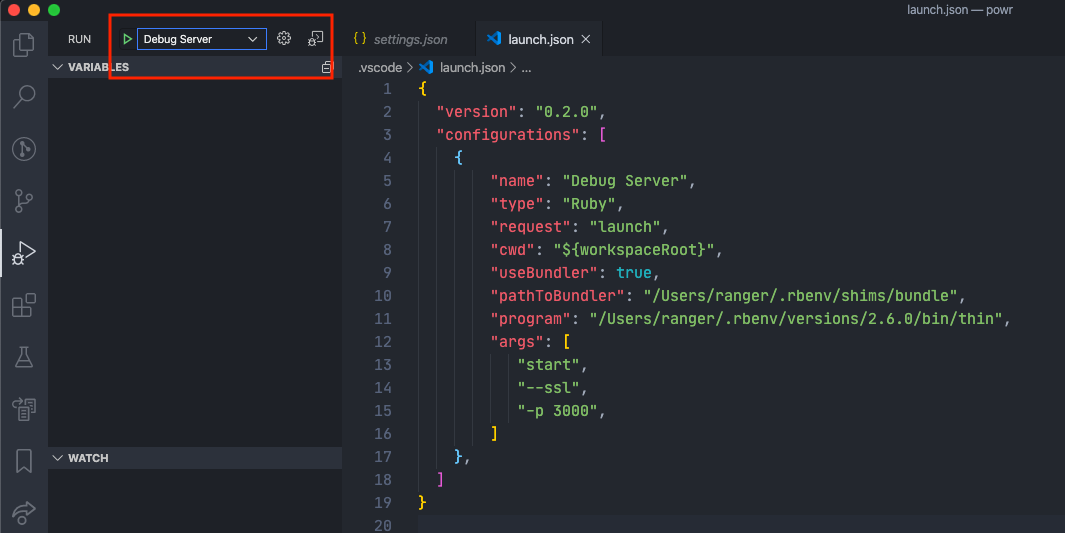
- Hit on play and don't forget to stop any running server on the same port
- Don't forget to update rack timeout on local machine. Open application.yml file and add RACK_TIMEOUT_SERVICE_TIMEOUT: '1200000' under development variable
- Enjoy your breakpoints!
#debug #debugging #rails #server #forget-binding-pry